
- Integrations
- OneLogin
Integrations
OneLogin
This tutorial demonstrates how to integrate Criipto Verify with OneLogin
This tutorial demonstrates how to integrate Criipto Verify with OneLogin. The following steps are required to complete your first login:
- Register your OneLogin tenant in Criipto Verify
- Configure the OAuth2 flow
- Create a OneLogin Trusted IDP for Criipto Verify
Register your OneLogin tenant in Criipto Verify
- Login to you Criipto Verify account - https://dashboard.criipto.com/applications/add
- Navigate to Applications
- Select the
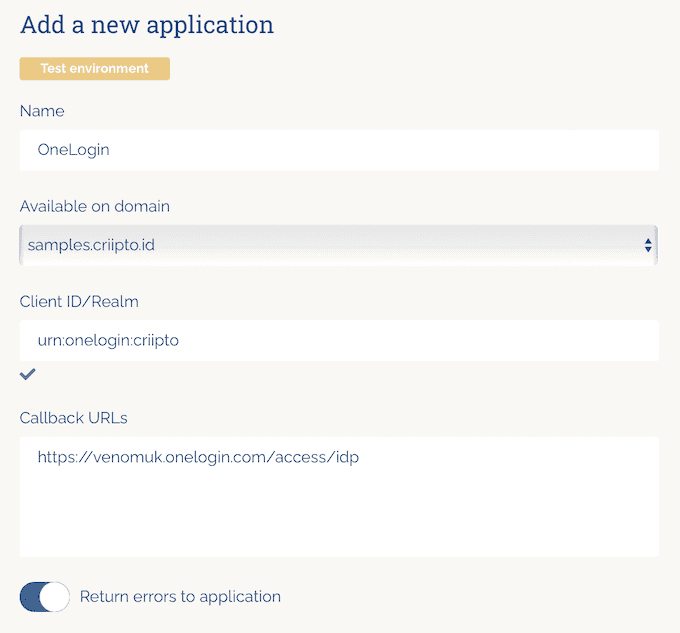
+sign to add a new application - Provide the necessary information on the Register Application Screen
- A name for the application. For this example OneLogin has been chosen.
- Select the relevant domain from the
Available on domainsection. This will be the domain used to communicate to OneLogin. If you only subscribe to one Criipto Verify domain, only one will be listed. - Add a Client ID/Realm to identify the OneLogin Tenant in Criipto Verify. In this example
urn:onelogin:criiptohas been assigned. - Add the applicable Callback URL for you OneLogin tenant in the format of
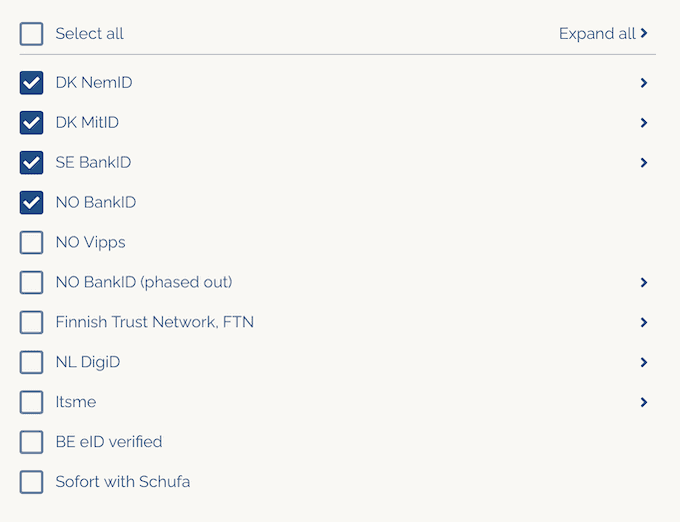
https://<SUBDOMAIN>.onelogin.com/access/idp. - Choose the relevant legal/bank identities you would like to integrate.
- Once you are happy to proceed select
Save.
A completed application registration will look as follows:
Configure the OAuth2 flow
- Navigate to applications
- Select the application configured in the previous section
- Scroll down to the OpenID Connect application section and enable
Enable OAuth2 Code Flowby selecting the corresponding toggle: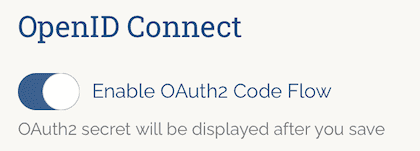
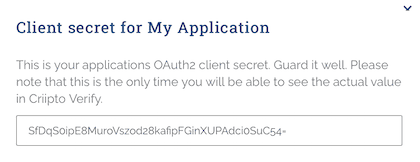
- Click
Save - The client secret will be displayed - This will be needed when configuring the Trusted IDP within OneLogin. Please note this is the only time the client secret will be displayed. Criipto only stores the client secret as a hashed value, meaning it can not be retrieved again once generated and stored.
- Leave remaining settings as default.
Create a OneLogin Trusted IDP for Criipto Verify
- Authenticate to the OneLogin admin console with an appropriate administrative account.
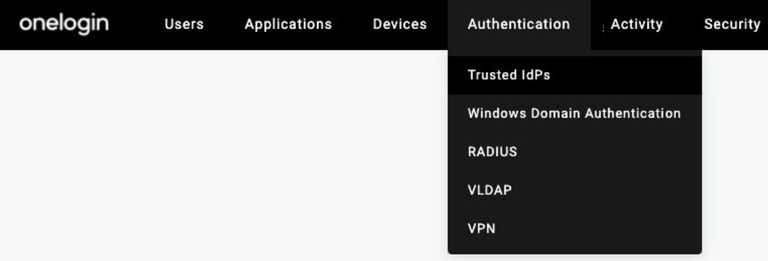
- Navigate to Authentication -> Trusted IDPs
 Please note: For additional information on OneLogin Trusted IDP please refer to the Trusted IDP knowledge base article
 - Select
New Trustfrom the top right - Provide an appropriate name. Please Note: For each legal/bank identity that needs to be integrated with OneLogin, a separate Trusted IDP needs to be configured. For the purposes of this documentation NO Bank ID, will be used as the example.
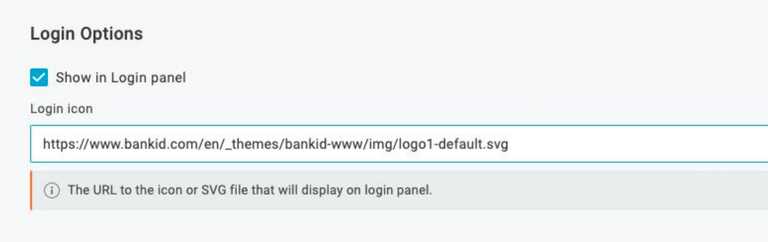
- In the Login Options section, if you wish to represent this Trusted IdP as an authentication option on the tenant’s login page via an icon, then check Show in Login panel and provide a url to a suitable icon. (Note: websites typically host a “favicon.ico” file that could be used e.g. https://www.onelogin.com/favicon.ico)
In the example of NO BankID, https://www.bankid.com/en/_themes/bankid-www/img/logo1-default.svg can be used
- In the Configurations section, enter the Issuer URL. This will be the domain chosen during the Criipto Verify signup process.
- To review your domain in Criipto Veirfy navigate to Domains from the admin console and be sure to prefix
https://
- (OPTIONAL) The Email Domains field is used to automatically invoke this Trusted IdP when a user enters their email address at login time - if the email address is unrecognized, but belongs to one of the domains listed, then this TIdP will be invoked via an authentication request. This setting can be left blank if invoking this Trusted IDP from the OneLogin login panel is the preferred method.
- Check
Sign Users into OneLoginand deselectSign Users into additional applications. - Scroll down to the protocol section select
OIDCfrom the dropdown - Add
{tidp.email}in the User Attribute Value in the User Attribute section or whatever is applicable to your use case. This is the attribute used for User attribute matching.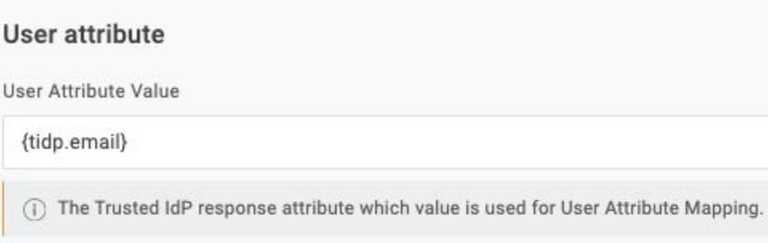
- Select Email for User Attribute Mapping or the value applicable to your use case.
- (OPTIONAL) Allowed Email Domains is a whitelist. This allows the administrator to restrict the acceptable email domains for inbound identities. If empty, there is no restriction.
- The authentication endpoint syntax is as follows
https://<Criipto Verify Domain Name>/<base64 encoded acr value for legal/bank id being configured>/oauth2/authorize- To identify what the base64 encoded acr value for legal/bank id being configured, please use Supported login methods table
- Therefore, in this example of Norwegian BankID the following issuer will be used:
https://onelogintest-test.criipto.id/dXJuOmdybjphdXRobjpubzpiYW5raWQ=/oauth2/authorize
- Select BASIC as the Token Endpoint Auth. Method.
- Add the relevant token endpoint. The Token Endpoint syntax would be:
https://<Criipto Verify Domain Name>/oauth2/token - Add the user information endpoint in the User Information Endpoint section. The user information endpoint syntax would be:
https://<Criipto Verify Domain Name>/oauth2/userinfo - Add the relevant scopes in the scopes section. At a minimum
openidmust be used. - Add the client ID specified in step 4 of the Registration of the OneLogin tenant in Criipto Verify to the Client Id section.
- Add the Client Secret in the Client Secret section as noted in step in step 6 of Configure the OAuth2 flow.
- Lastly In the Trusted IdP Settings tab, head to the top of the page and check
Enable Trusted IDPin the Enable/Disable field.
Supported login methods
| Login method | acr_values | base64 encoded |
|---|---|---|
| Norwegian BankID | ||
| Mobile or Web (user choice): | urn:grn:authn:no:bankid | dXJuOmdybjphdXRobjpubzpiYW5raWQ= |
| BankID Biometrics (level substantial): | urn:grn:authn:no:bankid:substantial | dXJuOmdybjphdXRobjpubzpiYW5raWQ6c3Vic3RhbnRpYWw= |
| Norwegian Vipps Login | ||
| Login with Vipps app: | urn:grn:authn:no:vipps | dXJuOmdybjphdXRobjpubzp2aXBwcw== |
| Swedish BankID | ||
| All options (user chooses): | urn:grn:authn:se:bankid | dXJuOmdybjphdXRobjpzZTpiYW5raWQ= |
| Same device: | urn:grn:authn:se:bankid:same-device | dXJuOmdybjphdXRobjpzZTpiYW5raWQ6c2FtZS1kZXZpY2U= |
| Another device (aka mobile): | urn:grn:authn:se:bankid:another-device | dXJuOmdybjphdXRobjpzZTpiYW5raWQ6YW5vdGhlci1kZXZpY2U= |
| QR code: | urn:grn:authn:se:bankid:another-device:qr | dXJuOmdybjphdXRobjpzZTpiYW5raWQ6YW5vdGhlci1kZXZpY2U6cXI= |
| Danish MitID | ||
| Level low: | urn:grn:authn:dk:mitid:low | dXJuOmdybjphdXRobjpkazptaXRpZDpsb3c= |
| Level substantial: | urn:grn:authn:dk:mitid:substantial | dXJuOmdybjphdXRobjpkazptaXRpZDpzdWJzdGFudGlhbA== |
| MitID Erhverv (MitID Business): | urn:grn:authn:dk:mitid:business | dXJuOmdybjphdXRobjpkazptaXRpZDpidXNpbmVzcw== |
| Finnish Trust Network | ||
| BankID: | urn:grn:authn:fi:bankid | dXJuOmdybjphdXRobjpmaTpiYW5raWQ= |
| Mobile certificate (Mobiilivarmenne): | urn:grn:authn:fi:mobile-id | dXJuOmdybjphdXRobjpmaTptb2JpbGUtaWQ= |
| Both of the above: | urn:grn:authn:fi:all | dXJuOmdybjphdXRobjpmaTphbGw= |
| Itsme | ||
| Basic: | urn:grn:authn:itsme:basic | dXJuOmdybjphdXRobjppdHNtZTpiYXNpYw== |
| Advanced: | urn:grn:authn:itsme:advanced | dXJuOmdybjphdXRobjppdHNtZTphZHZhbmNlZA== |
| Belgium | ||
| Verified e-ID: | urn:grn:authn:be:eid:verified | dXJuOmdybjphdXRobjpiZTplaWQ6dmVyaWZpZWQ= |
Test users
Almost all eID types have a notion of test users and real users.
Real users are real people logging in to a web site, thus voluntering their real name and typically also a social security number, SSN.
Test users are either created by you for the occasion, or we provide you with access to already created test users.
You may read more in the section on eIDs